Saturday, March 1, 2014

Camping Gear: Doing It Ourselves


"I can do it myself!"


We've heard that a lot in our house over the years.  And now we're saying it together about camping gear.

It started when The Man started researching the Superior Hiking Trail.  It's been a goal for him from the first time he heard of it's planning and finally he would now be able to section hike it himself.

In the process of choosing gear, he came across Ray Jardine.   Ray's style of ultralight backpacking was so appealing that we jumped in up to our ankles head first!  He explains it best himself HERE but - since it is my blog - I'll show you what we did!

Backpacks


Since they were going to be backpacking, The Man decided the first items we would make would be the backpacks.


These backpacks are our very first.  Made with the pattern and materials available HERE, we made them all ourselves from a stack of fabric, webbing and some really great, step-by-step instructions.  The Man made his own doing all the work himself though he had not stitched an inch since junior high.  That's right!  You do NOT have to be an experience seamstress to do this project.


Tarp and Tent


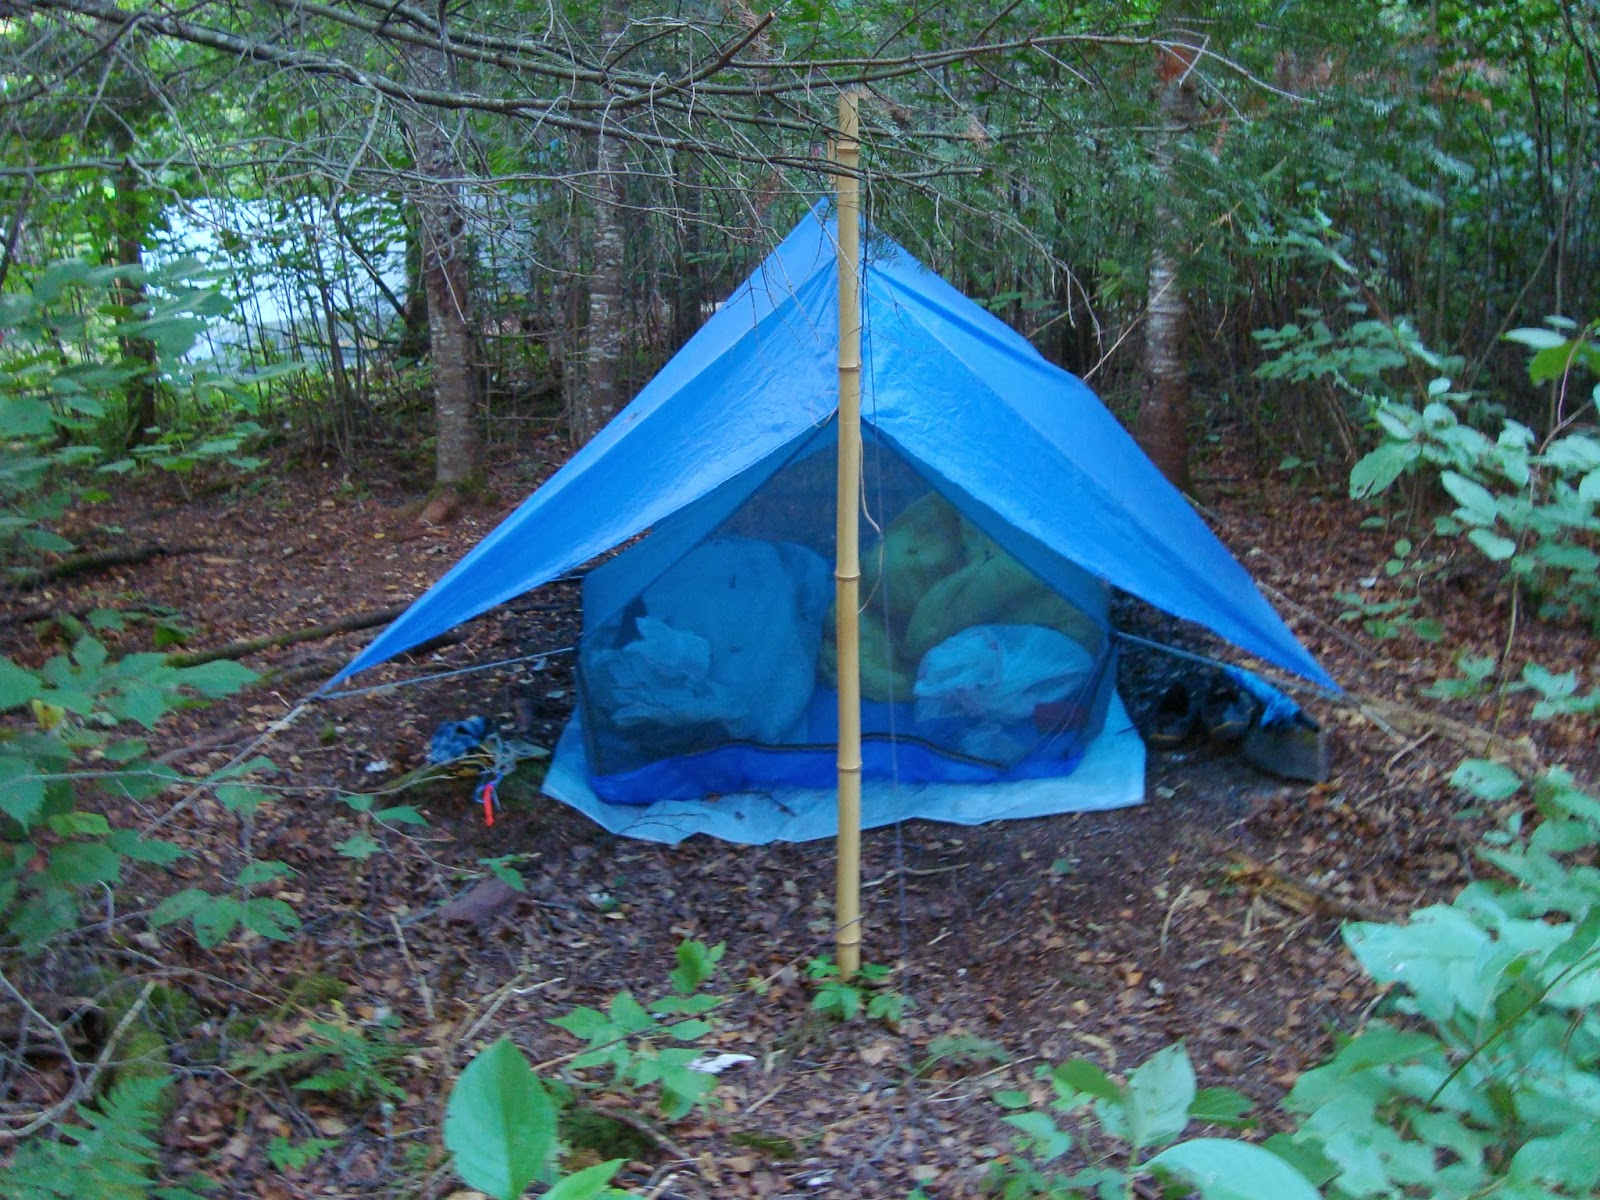
The whole idea of a tarp was foreign to me until we started researching the Ray-Way.  The best way to show it is in photos of the finished products.

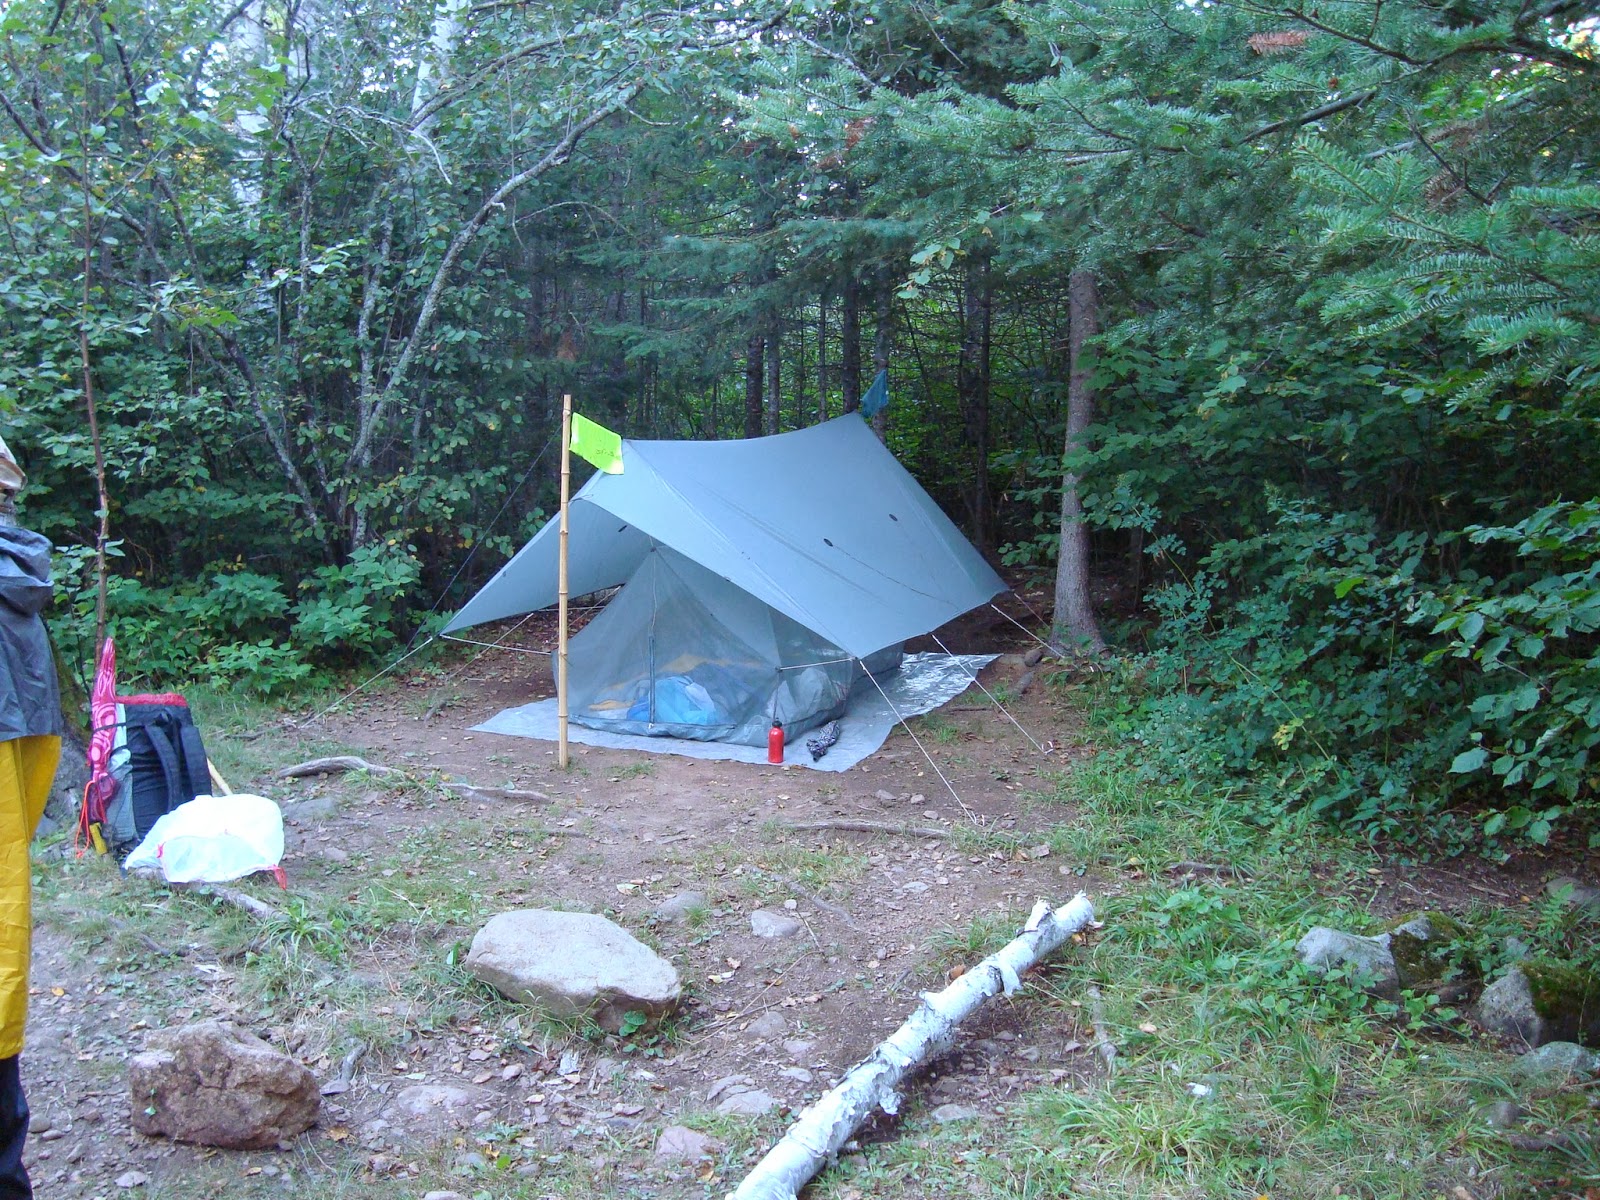
This is Bicycle Boy's two-man tarp.  He made it all himself and it packs down to about 4in x 4in x 8 in and weighs less than 27oz with the stakes it needs.
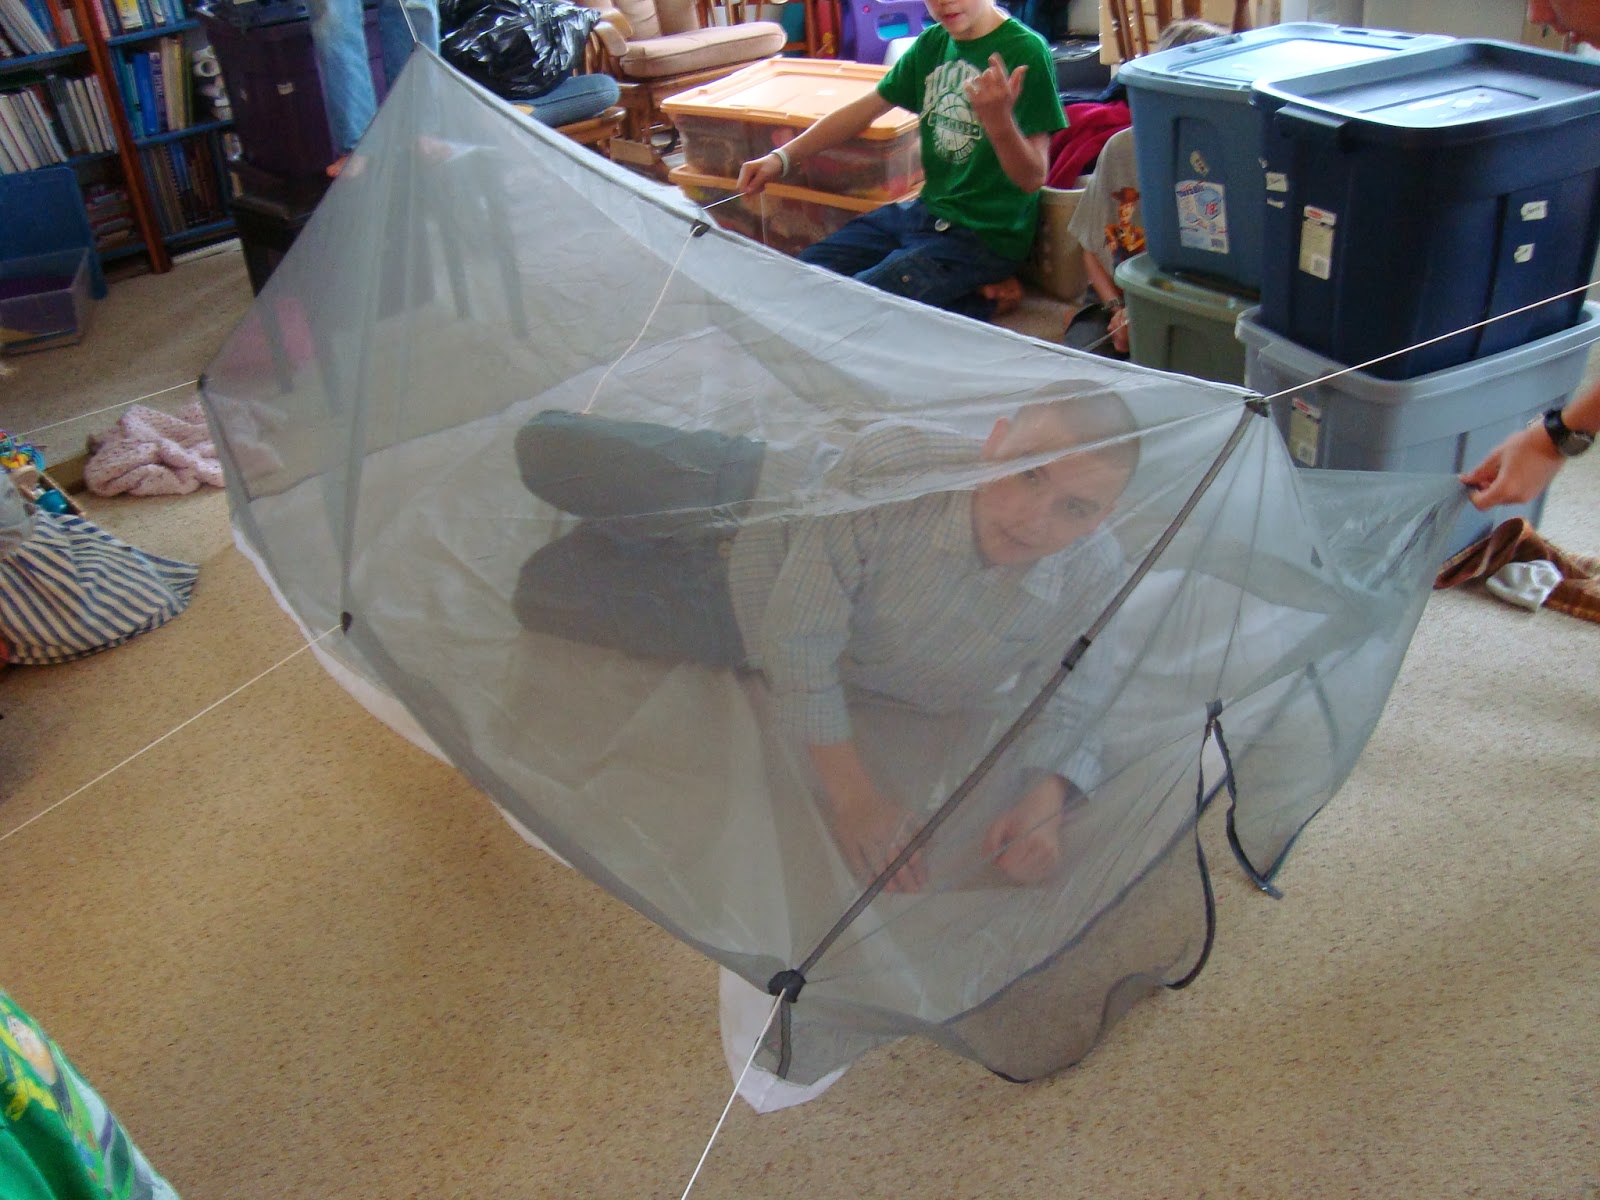
And here he is in his net tent that he also made himself.  It packs to a slightly small size and weighs 13 oz.

These two pieces fit together to make a versatile shelter that keeps the ticks and mosquitos out but still has great ventilation.  

On the trail! Lightweight bamboo poles were used as their uptight poles - which was very handy on the trail for keeping their hands from swelling during long walks. (If you have a pole in your hand, you don't let them hang and they don't swell up in a dependent position!)

Doo-Dah's two-man tarp and net tent (also made completely by him).  Note you can pitch these great shelters at different roof angles and heights depending on your needs and space.

Quilts and Flat Mats

A quilt is the replacement for a standard sleeping bag.  Shaped roughly like a mummy-style sleeping bag without one-third of the body section, it has some great advantages we had never thought of before!  Since the insulation underneath the body doesn't insulate once compressed, it's eliminated from the design to reduce weight and bulk.  Since the directions in the quilt kit include custom sizing, the result is a perfect fit in the smallest, lightest package possible!

Sleeping mats are the protection from the ground in two ways.  The first is to keep the happy camper on a cushion.  But the second - and most important to us in the North - is to insulate the camper from the cool ground.  In the past, we used self-inflating mats.  Now we use the sleeping pad kit for everyone!


These are out Toddler Versions of the sleeping mat as modeled by Oh Brother and Party Girl.

Do-It-Yourself leads to Custom Made

The most important and basic thing we learned from Ray & Jenny was "you can really do this yourself and come out with a much better product that is easier to maintain".  And we are certain we have!  This process has pushed us even further to think of the things we can do and adapt to our unique needs.

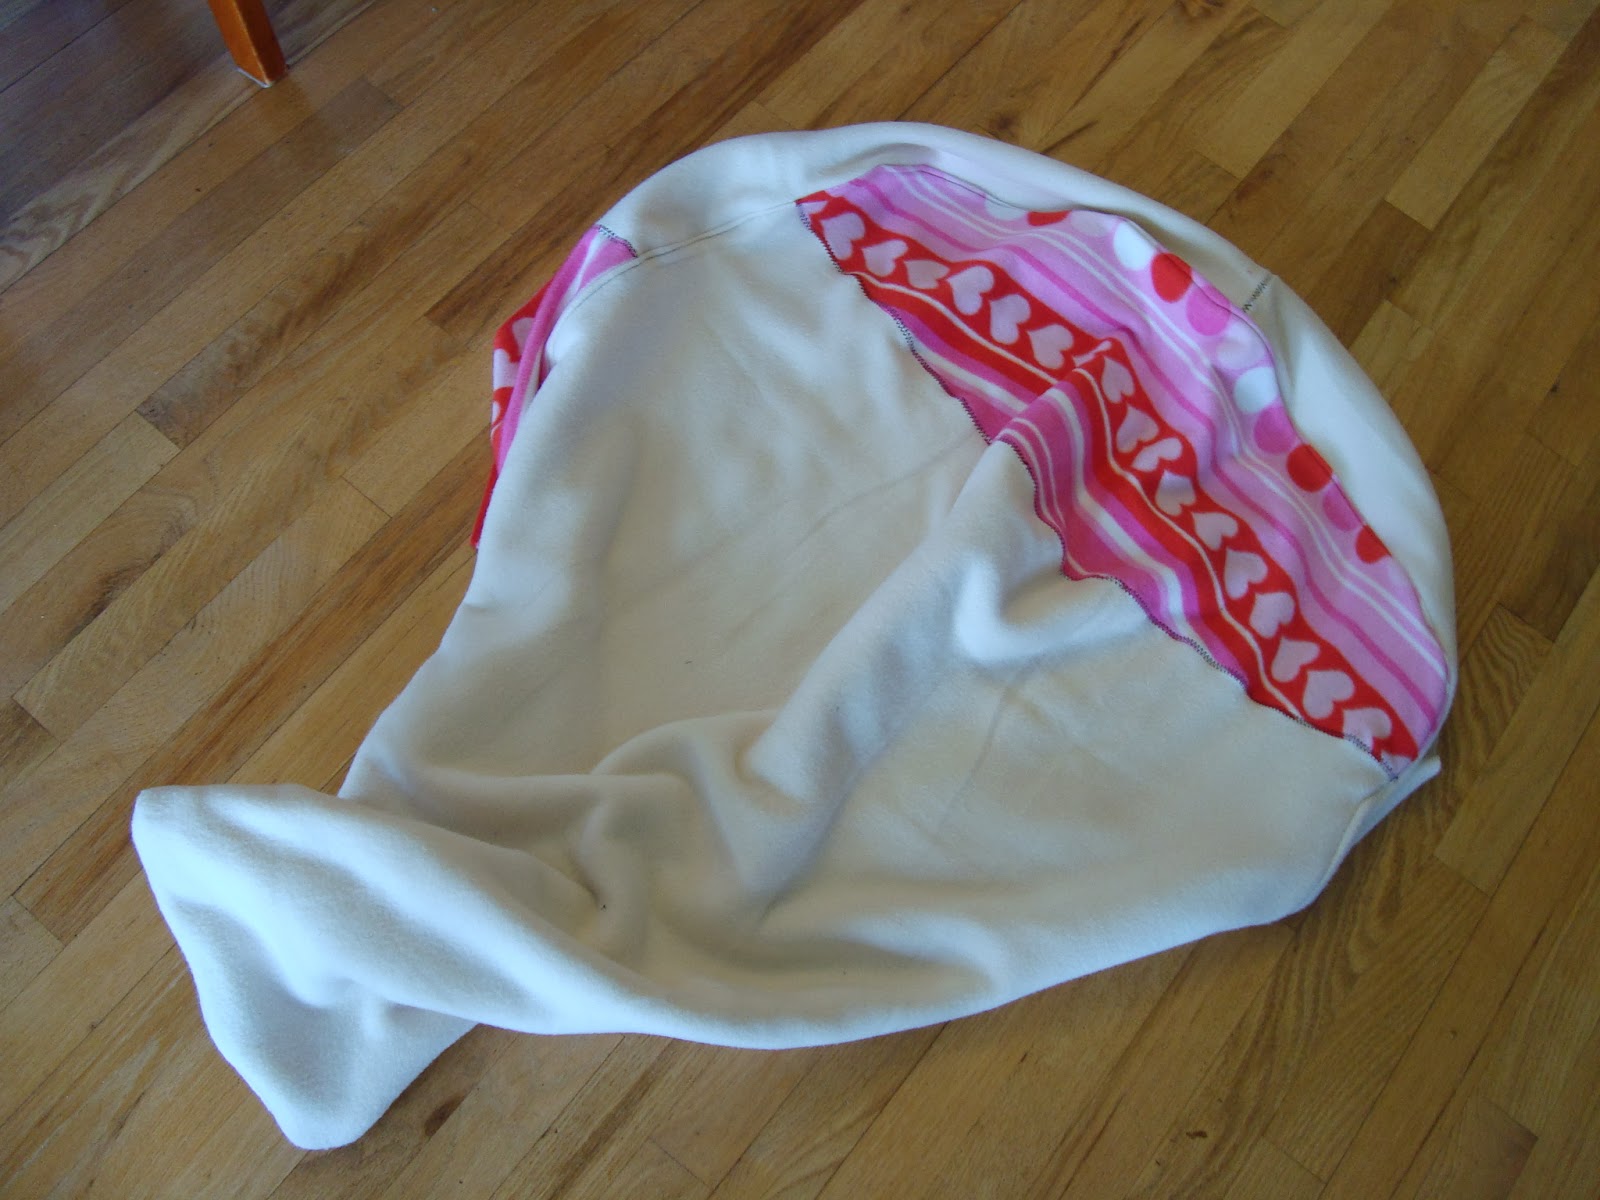
I've even made custom-fit toddler 'quilts' made from polar fleece.  Completely machine washable and light enough for a tot to carry themselves.

And THAT, in a nutshell, is our current camping and hiking gear set!  It's meeting our needs so well that we've actually given away our sleeping bags and inflating mats.  Encouraged by the things we've learned and the success we've had, I suspect this will be the last big change we have in our camping gear styles.  It suits us well!


Wednesday, January 15, 2014

Sleeping in Tents

When I tell others that we go camping and sleep in tents, I often hear these questions:
What do you sleep on?  
Isn't the ground cold and hard? 
Minnesota is cold all year around at night.
Don't those kids just freeze?!

Our sleeping gear has changed over the years, and at each stage we were pretty satisfied for the most part.

The Pile

For our first camping trips our children slept on piled, inexpensive bed comforters on the tent floor and covered themselves with a couple of polar fleece throw blankets they had each acquired as gifts as toddlers.  We took their bed pillows along for them and away we went!


See that stack on the end of the table?  That huge stack just for two or three children.
See that poor guy thinking, "Where am I going to fit all this back into the van?"
At that time in our camping, that was a good way to go for us.  All the gear was things that we had around anyway.  No extra expense & nothing else to store!  Awesome.

But the drawbacks were two-fold.  The Pile is really bulky.  Those items were well over half of our gear for the trip.  And The Pile is also not very warm.  The comforters' insulating layer is easily compressed.  It's designed to insulate by holding air above the body.  When under the weight of a body, they compress.  When the loft is gone, the insulation is gone, too.  Bummer.


So, we went on to our next plan!

Standard Backpacking Gear

There are lots of foam mats and sleeping bags that are targeted at backpackers. Boasts of light packweights and compact options abound.  When we were first buying these, we went to Cabela's store and compared them ourselves... as best as you can from the store shelf, anyway.

We came home with the version of these available in 2004.  We got two longer ones that could be velcro-ed together for us old parents to use and torso length mats for the children.


Full-body mats are maroon.
Torso mats are blue.
Unrolled and rolled & packed.
Yardstick and two-liter bottle included for size perspective.


These mats are self-inflating, open-cell foam. They were quite light weight and compress to nice, tidy packages.  Very nice pairing with our sleeping bags.


Our Kelty Light Year +45 sleeping bags, purchased at about the same time as our mats, served us very well!  Down-filled and mummy style, it was excellent insulation for all the children.  Even our toddlers did well in these bags.  

Sleeping bag hint - Short people can get lost in the bottoms of their sleeping bags.  This situation will result in midnight muffled cries and someone getting up to rescue the lost child.  A better solution is to use a ponytail holder on the foot end of the sleeping bag.  Customize the length of any bag to fit your shortest campers!

Though I love the materials and washing machine friendly features of these bags, the compact size is what made them most wonderful.  In the photo you see two full-sized mummy bags in their compression packs.  Coming in just about the size of a 2-liter bottle, we could tuck all the bags for our whole family in the little nooks & crannies of the van.  Packing was made so much easier than the days of the pile of blankets.
And now...

You're speaking in past-tense, aren't you?  What's up with that?  Well, just like we've done with our tents, we've changed our choices yet again.  Learning from ultralight backpacking and Ray Jardine, we've started making our own gear and making the adaptations to them that make them just right!   But that's another blog post, too...


Tuesday, September 24, 2013

Tents

Camping is an experience.

Camping with children is an adventure.

And camping with children with lousy gear?  That's just crazy.

We tent camp.  It's been an evolution of sorts but for all the years we have done it in tents.  As our family size and needs changed, so did our choice of tents.

Cabela's Alaskan Guide Tent system was our very first tent purchase.  We looked far and wide for a way to get 2 adults and 7 children into tents without having to be strung out over many campsites.  


Our first camping trip.
September 2003

Now, it looks like only the 8-man dome is available but, when we ordered, we got the 8-man (on the left) and the 6-man (on the right) as well as the joining vestibule.  We called them our "Turtle Tents" because they looked like two huge sea turtles standing head to head.

The Man & I and the infant at the time took the 6-man tent and the rest of the children took the larger tent.  As you can see, they are quite tall in the center.  Jason could nearly stand in them. Talking between the tents was just like talking through a hollow core door.  We even got a lantern with a remote so I could turn on the light in the kids' tent without having to get up myself.

The drawback of this system was footprint and weight.


Seven of our eight children on that first camping trip.

At a standard size campsite, we were so close to the fire ring that we couldn't safely use it during our stay.

This variety of tent is also very heavy.  All the poles are aluminum and, thought that's a light material, there's just a LOT of material and gear to get these buggers up off the ground.  We got tired of lugging them in and out of campsites and the time it took to get them really going.

It was a good set for us for that season of our lives, but eventually we needed more smaller tents for ground space and weight reasons.


The Kelty Villa tents were our next try.  (For some reason, I can't find any photos of us using these tents.  Must have been a dry spell in my photo-taking-mom years.  I've had several of those actually.)

We got the 4-man and the 6-man version of these tents and they were really a sweet deal!  Light weight and fairly simple to put up, these semi-dome style tents were really handy.  The rain fly was complete (covers the whole tent) which is a must in the way we camp.  We'll be there in the driving rain if it looks like it will clear up in a day or two.

These were pretty easy to put up for adults that understand simple leverage concepts.  Well made like nearly all Kelty brand things we've ever purchased.

But, unfortunately for the Keltys, we also ordered the Eureka Assault Outfitter 4 tent at the same time.  

Lake Itasca
2012
This 4-man tent is mostly dome style in my opinion.  Not quite a true domed tent, it uses only 3 poles and 9 stakes to be up and ready for most weather. Add the storm tie-downs and you have a real three-season tent.  The ventilation is quite good.  Construction quality is great.  AND (the best part for us now) it can be put up by three children under the age of eleven.

This summer we have been camping with six of them:

One for Dad & Mom
Two for Girls
Three for Boys

Editor's note:  Since we've purchased our Eureka Assault tents, we have also entered the adventure called "Ultralight Backpacking".  Here we discovered Ray Jardine and the Ray-Way Tarp kit.  Now THAT's a light weight, simple tenting system right there.  And we really like it.  But that's another blog post.


Tuesday, July 30, 2013

Camp Cooking: The Abbi Bar

Abbi Bar is the name we use for our version of Lara Bars. I got the recipe from a dear gal, Abbi, who is super smart and super aware of allergies. These bars are gluten free and casein free. They are also very simple and easy for all ages to eat.

I use my Ninja blender. A sturdy food processor should work.

Probably.
I don't think the cheapo blenders will do the trick and I would hate to have you burn out your appliances on something that it just couldn't handle but - you're a big kid and can probably figure out what you want to do. 

The basic ingredients are simple:

1 cup whole nuts
1 ¼ cup whole dates

My happy Ninja with almonds & dates.

From there you blend & go.

After a minute.

Finished enough for me at about 3 minutes.  Note that it's not all uniform.  The very bottom is quite smooth but there are still lots of nut & fruit pieces clinging to the sides.

Scraped out onto a plate.  You can see the variation clearly here.

Oops!  I forgot to add the cocoa powder I wanted.  It's ok.  Just put some on and knead it in.

A little bit of cocoa swirl packs a great flavor punch.

Roll two ounces at a time into logs and wrap in plastic wrap.  Flatten to stack better.
This batch made eleven bars, 2 ounces each.  And one 1 ounce snack.
Three ingredients?  Can't beat that with a stick.


Because we use these a few times over the course of a camping trip, I like to make a couple different varieties. Here's what I've done but - if you keep about the same ratio, you can do any dried fruit & whole nut combo!

almonds & dates

almonds, dates, cocoa & almond extract

almonds, apricots, & coconut (pulsed in at the very end so it's still visible)

cashews & mixed dried fruit (pineapple, mango, coconut)

raisins, peanuts & a little vanilla

Any combo of nuts to make one cup and any combo of fruits to make 1 ¼ cup. A small shot of extract if you like. That's it!

Editor's note:  Also find the Fabulous Abbi over at OneSock Pictures and - if you are in the 574 area code- CALL HER for your next photo session!  Let her show you how your ordinary really is extraordinary. She can.

Thursday, July 25, 2013

Camp Cooking: Meal Making

In September, we will celebrate 10 years of camping with children.  We've made a variety of changes in our plans and equipment over the years.  Meals have had to change as time has gone on as well.  Three things have driven our meal choices:

  1. Must be able to serve MANY eaters of ALL skill levels.  When we started, we had seven children ranging from 8 years to 8 months.  In June of this year it was fifteen of us from adults & teens to 2 yrs old.  That's a lot of different skill levels.
  2. Must be CHEAP!  Camping can make vacationing less expensive for a family our size.  I want to keep it that way.
  3. Must be EASY! When camping, so many things are unpredictable.  Add children to the mix and... well.  It doesn't get more predictable.  Making meals should be simple without any hassle at any step of the process.
I'm going to drag out my menu from last post and show you how I put these three are put into practice at our campsite.

Day 1: AM
Breakfast Blobs (use 5# sausage)
sliced peppers
Really called Sausage Cheese Biscuits, these little wonders have made
a great "departure day" meal for several years now.  They are warm, filling, and
full of carbs AND protein AND fat.  Managed by toddlers to adults with a
bunch of last minute jobs on the run, they are my goto for Day 1.  I serve
with something fresh and easy with natural moisture and crunch.  This time
it was peppers I had sliced the night before.
Day 1: Road Meal
Kettle Korn
sliced peppers
apples

I bagged up the extra peppers from breakfast.  
Kettle Korn is easy-peasy if you have a stovetop popper like mine.  I use1/4 cup popcorn kernels, <1/4 cup sugar and ~1 TB oil. Pop, cool and bag for the road.  DONE.  To serve, I use #4 Cone Coffee Filters.  They pack flat, are easy to fill with dry 
finger-foods, cheap and disposable. 
I also drug out some bags of apples and we were
all set when we pulled into a rest area on the way north.  We polished off 3/4 gallon
peppers, 2 1/2 gallons of Kettle Korn, and 5# of apples here.  **The order of serving 
is significant here.  Eat the raw veggies first, kids. If you are hungry, you will eat 
them.  if you aren't hungry enough to eat them, you don't 
need Kettle Korn either.
Day 1: Evening Meal
last of the peppers
2# raw carrots
Beans & Burger
2 bags Twizzlers
This is an easy to eat, feel-good meal that I heat in my large stockpot on
our two-burner LP stove.  All ingredients are pre-cooked. Serve in mugs
 with shredded cheese (1.5lb) and eat with Sporks.
4# burger, browned & frozen for transport
1 qt bag of fried onions, frozen for transport
four 28oz cans baked beans
two 28 oz cans pork-n-beans
one XL can pinto beans, drained
2 cans kidney beans, drained
3 cans black beans, drained
3 cans butter beans, drained
Day 2: AM
leftover Breakfast Blobs
hot chocolate
bananas
We had over 50 biscuits left on our departure day.  I plan it that way and
pack the extras for this first breakfast.  Fresh bananas are an easy
 food for everyone here.  Hot chocolate is a powder that we 
add to heated water:
11 cups dry milk powder
~16 oz chocolate milk mix

1/2 cup baking cocoa
(I add the cocoa to make it darker flavored.  The original recipe

I had also had non-dairy creamer & powdered sugar in it but I'm cheap.)
I use about 1/4 cup for evey cup of hot water.  About.


Day 2: Snack
apples
Abbi Bars
Abbi Bars are a home made version of Lara Bars.  Gluten Free &  Casein Free,
these little gems are a power house of flavor and energy in a package that
adults and toddlers can both eat and enjoy.  Find the recipe in my next
post and the variations are many.  They deserve their own post.  We ate 24 bars
and 8# of apples for this snack time.
Day 2: Evening Meal
celery
spaghetti
Oreos
Once I get someone handing out fresh celery to the circling vultures, I get some
 water boiling for pasta.  But it's not just regular pasta cooking that I do at camp.  I 
cook my pasta at home and dehydrate it so I can quickly rehydrate it instead of boiling
 and draining.(I have never found a way to do that trick without almost scalding
 my toes.) I used 5# small shells this time.  Orzo works great but costs more.
  I choose a variety that will fit easily on our Sporks and will work well for small mouths.  I heat a scant gallon of water to boiling and add the pasta to the pot.  Once it's ready, the rest goes in. For this meal, we used 3# Italian sausage with 
onions & zucchini, fried and frozen. To this we added 7 cans Hunt's spaghetti sauce (because it comes in a metal cant that won't break in transport).  We like to serve with parmesan cheese and, for camp, we don't hold back 
much.  We use a full pound of that.
Day 3: AM
GORP
bananas
cappuccino
Good Old Raisins and Peanuts (GORP) is an easy one for us now that all of us
can chew nuts.  Sometimes I add M&M's if I'm feeling generous.  Bananas
are still fresh and cappuccino is considered a treat (and a convenient
 warm beverage.)
Day 3: Snack
dry fruit
cheese sticks
We dehydrate fruit for our trips and general snacks.  Here I served a couple
gallons of dry apples in coffee filters and 24 string cheese sticks.
Day 3: Evening Meal
carrots
mexican
Twizzlers
This is a favorite meal for my troops (except maybe the carrots). My
apologies for calling it "mexican" when it is so clearly an upper-midwest hotdish
sort of meal.  It is what it is and I needed a name for it.
I start by reconstituting cooked, dehydrated brown rice.  This trip I used two boxes
from Aldi.  I'm not super close on measuring at camp because the meals are
planned to have moisture.  Rice that ends up a little wet is not a problem.
Once that's done, I just start dumping in ingredients:
4# ground meat (We have our own Chorizo!) Frozen for transport.
2-3  onions, chopped and fried. Frozen for transport.
2 cans whole kernal corn, drained
2 cans hominy, drained
3 cans black beans, drained
5   24 oz jars salsa
Heat through and serve over tortilla chips (we use 3 bags) with shredded
cheese (1.5lbs) and sour cream (4 pounds).
Day 4: AM
almonds
dry apricots
hot chocolate
Just as easy as it sounds.  This is NOT a great meal for tots that don't chew
nuts, but mine are nut grinders, so we're good.
Day 4: Snack
GORP
dry bananas
From here, it's pretty much repeats and leftovers.  We're camping.  It's exciting
every moment of the day!  Live with repeated meals.  It's ok.
Day 4: Evening Meal
carrots
spaghetti
Oreos

Day 5: AM
leftovers
(no hot beverage)
On the last morning, we're all packing the last of our goods and getting ready
to hit the road.  I want the last of the fresh fruit & veggies gone by now.  The last
of whatever snack I have?  Pass it out and get it all eaten.  We all don't
eat the same things but we all get fed.  
Day 5: Snack
leftovers
We usually drive straight home w/o stops to run around very much.  We're tired.
The kids are tired.  We just wanna eat when we are hungry and put the miles
behind us.  It's a time for debriefing and resting.  Eating is an afterthought.

Saturday, June 22, 2013

Camp Cooking: The Plan

We camp.

And we eat.

That requires a bit of planning, some gear, and a whole lot of food.

For many people that would mean lots of hot dogs & s'mores, eggs in a cast iron skillet over the campfire, and those little pies you make over the campfire embers.

Like you would expect by now, we do things a little differently with camping foods, too.  I've had to feed fifteen people in a wide variety of weather conditions, activity levels, and self-feeding levels.  Hot dogs won't make the cut.

We just returned from a four-night stay at one of our favorite MN State Parks.  This time we camping in the normal campsites at Gooseberry Falls.  (We have spent a lot of time at group camp sites in the past but that topic needs its own post.)  Four nights for us means:

  • one Departure From Home Meal
  • two Road meals
  • four Evening Meals
  • four Morning Campside Meals
  • four to six Snacks
My first step in this task (ok.  Any task.  I like a good list.) is to make a good list!  And, I've done this gig enough times now that I simply refer to my "CAMPING" file folder and refer to last trip's lists to begin with. Here's the list from last time: 

Day 1: AM
Breakfast Blobs (use 5# sausage) 
Sliced peppers

Day 1: Road Meal
Kettle Korn
Sliced peppers
apples 

Day 1: Evening Meal
Beans & Burger

Day 2: AM
leftover Blobs
bananas
hot chocolate

Day 2: Snack
apples
Abbi Bars

Day 2: Evening Meal
celery
spaghetti
Oreos

Day 3: AM
GORP
bananas
cappuccino

Day 3: Snack
dry fruit
cheese sticks

Day 3: Evening Meal
carrots
mexican
Twizzlers

Day 4: AM
almonds
dry apricots
hot chocolate

Day 4: Snack
GORP
dry bananas

Day 4: Evening Meal
carrots
spaghetti
oreos

Day 5: AM
leftovers
(not hot beverage)

Day 5: Snack
leftovers


Purchasing, preparing and packing are really important to make my camp meals work out right.  That will be my next post.

Tuesday, May 14, 2013

The Fritter


Fritter 
noun
a piece of fruit, vegetable, or meat that is coated in batter and deep-fried.

New Oxford American Dictionary 2nd edition © 2005 by Oxford University Press, Inc.

That's an official definition of a fritter.  I have asked a few folks from different parts of the US and it seems there is a wide variety of presentations of this thing called a "fritter".


In my house, a fritter is a way to bring new life to leftovers.  I've only used vegetables in my fritters but, theoretically, anything could be used with varying levels of success.


That is my corn fritter batter. I used the corn we froze last year and it has butter and cream in it right from the freezer.  When mixed with egg and a little flour if you like, it makes a batter that is similar to pancake batter in consistency.  


.

Fried in butter and served hot from the pan, they are a great meal for us any time.